March 2014
Here are some photos taken of the recently build PC. It was meant to be a detailed instructions with pictures on how to build your own PC. Unfortunately after the first few steps, the PC building process was more exciting than taking pictures such that I've forgotten to take photos of the later steps.
In any case, from previous building experience, it is the first few steps which are crucial in building the PC.
This illustration would be very similar for most desktop systems.
The system is an extremely budget system.
APU: AMD A8-6600K Quad Core, 4.2GHz Max Turbo, 3.9GHz Base, Black Edition
Mobo: Gigabyte GA-F2A88XM-DS2, A88XFM2+, 2xDDR3/PCI-E/SATA3/USB3.0/DVI-D/D-SUB/RAID/mATX
RAM: Kingston HyperX 16GB (2x8GB) DDR3
HDD: Western Digital 3.5"Green2TB WD20EZRX, 64M SATA3
Case: ThermaltakeVO650B1W3A, Versa-I, USB3.0, TowerCase, 500W PSU
1. Where to Screw down the Motherboard.
Previous PC building exercise almost ran into serious trouble when I used the wrong screws for screwing in the base of the Case to the Motherboard.
There is actually a Base Screw, shown in the photo, that needs to screw to the case, then letting the motherboard sit on top of these screws. So this type of screw between the case and the underneath of the motherboard, prevents the two from touching, to avoid a short-circuit

Here are some photos taken of the recently build PC. It was meant to be a detailed instructions with pictures on how to build your own PC. Unfortunately after the first few steps, the PC building process was more exciting than taking pictures such that I've forgotten to take photos of the later steps.
In any case, from previous building experience, it is the first few steps which are crucial in building the PC.
This illustration would be very similar for most desktop systems.
The system is an extremely budget system.
APU: AMD A8-6600K Quad Core, 4.2GHz Max Turbo, 3.9GHz Base, Black Edition
Mobo: Gigabyte GA-F2A88XM-DS2, A88XFM2+, 2xDDR3/PCI-E/SATA3/USB3.0/DVI-D/D-SUB/RAID/mATX
RAM: Kingston HyperX 16GB (2x8GB) DDR3
HDD: Western Digital 3.5"Green2TB WD20EZRX, 64M SATA3
Case: ThermaltakeVO650B1W3A, Versa-I, USB3.0, TowerCase, 500W PSU
All other parts such as DVD-RW, Wireless Adapter, LCD Monitor, Keyboard, Mouse, etc are recycled from the previous system.
1. Where to Screw down the Motherboard.
Previous PC building exercise almost ran into serious trouble when I used the wrong screws for screwing in the base of the Case to the Motherboard.
There is actually a Base Screw, shown in the photo, that needs to screw to the case, then letting the motherboard sit on top of these screws. So this type of screw between the case and the underneath of the motherboard, prevents the two from touching, to avoid a short-circuit
2. Check out exactly where the Back Panel of the case, need to correspond to the Connectors part of the motherboard.


3. Now start by screwing in the Motherboard to the Case. Ensure that the Motherboard is sitting properly on the Base Screws and not touching the Base Case directly.


4. Here is a view of the CPU, just before it is put into the slot. Many Motherboards are designed such that the CPUs will slot into the holes in only one way. So if the CPU does not slot gently into the Motherboard, never apply force on it - otherwise the pins can be damaged.
Once the CPU has dropped into the pin slots, then push down and latch the silver bar.

5. Once the CPU has been attached, the next part would be the Heatsink and Fan, which sits on top of the CPU. Before actually clipping the Heatsink, place it in the right position, and feel the latch to check how it is supposed to go. Play with it first to see how flexible it is, before actually fitting it in.
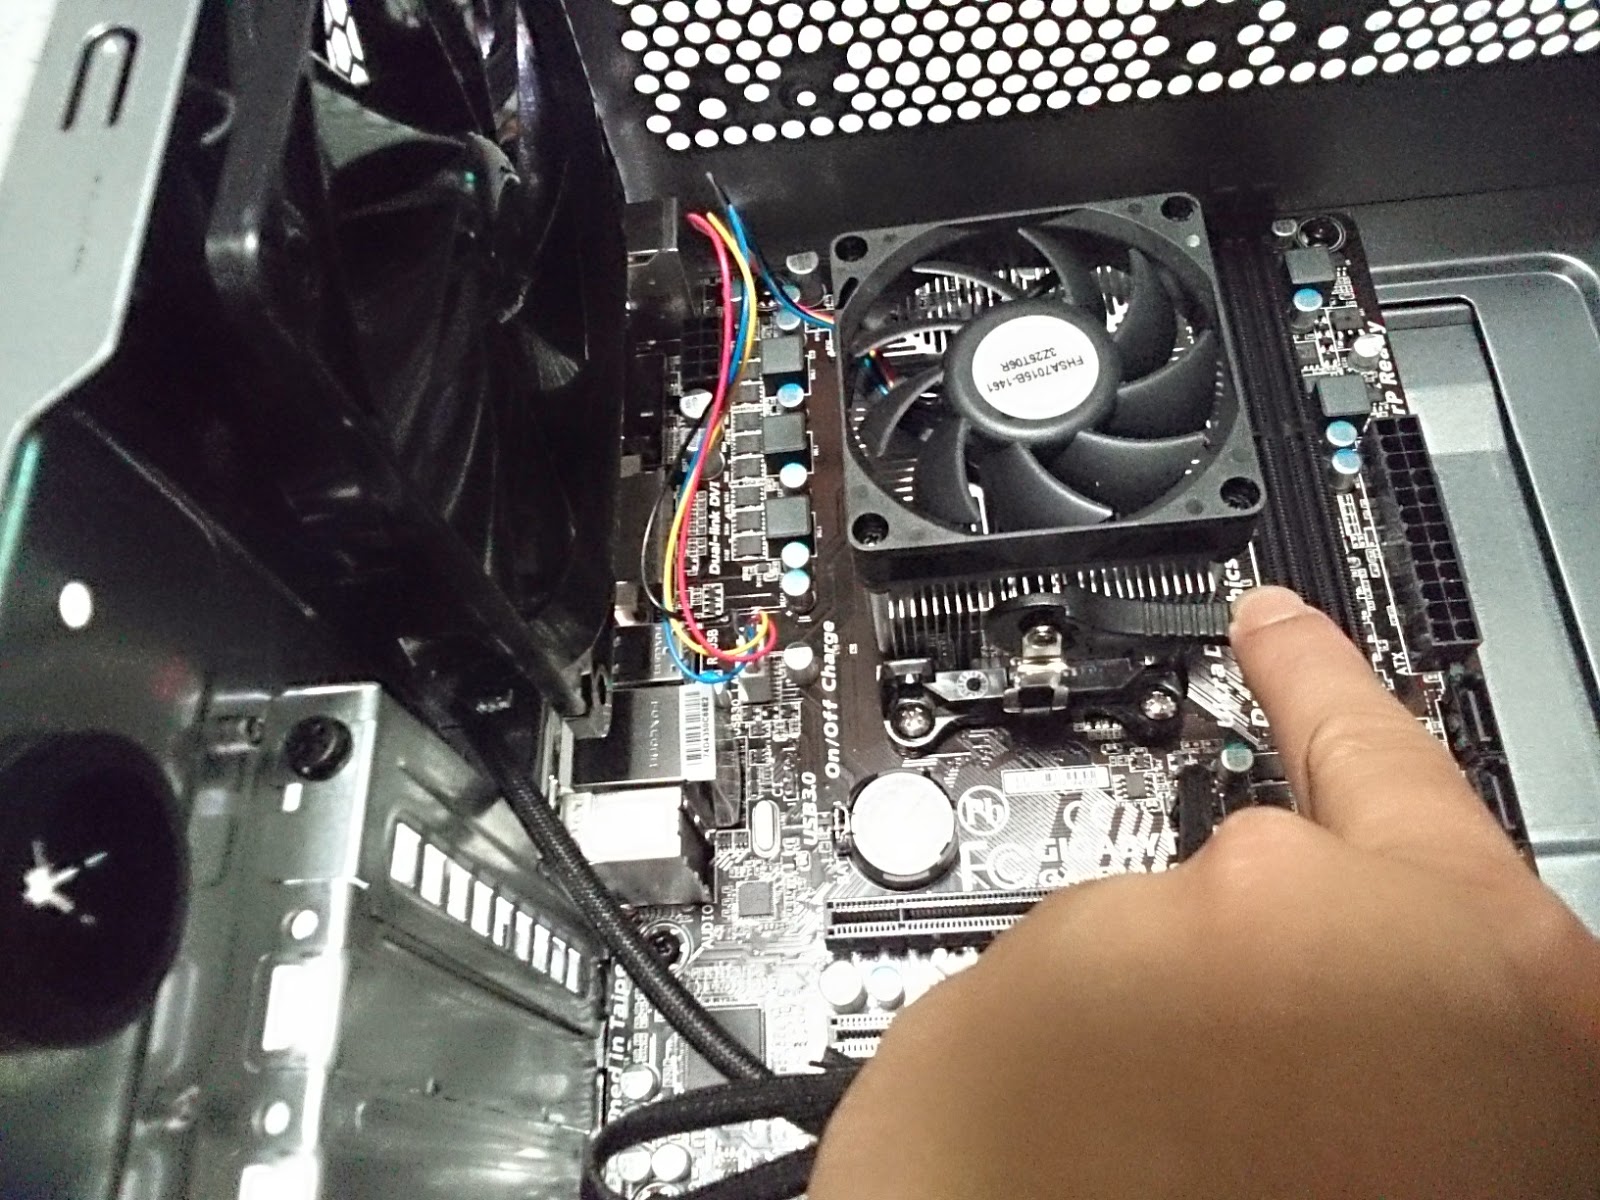

6. The CPU installation was done first so that the other parts can be installed around it.
Plug all necessary cables from the Case to the Motherboard. This could be fan or drive cabling.

7. Next install the RAM. The modern motherboard has a simple mechanism for installing RAM. Ensure the RAM is the right side, push the RAM slowly into its slot until the latch is activated by the click sound.

3. Now start by screwing in the Motherboard to the Case. Ensure that the Motherboard is sitting properly on the Base Screws and not touching the Base Case directly.
4. Here is a view of the CPU, just before it is put into the slot. Many Motherboards are designed such that the CPUs will slot into the holes in only one way. So if the CPU does not slot gently into the Motherboard, never apply force on it - otherwise the pins can be damaged.
Once the CPU has dropped into the pin slots, then push down and latch the silver bar.
5. Once the CPU has been attached, the next part would be the Heatsink and Fan, which sits on top of the CPU. Before actually clipping the Heatsink, place it in the right position, and feel the latch to check how it is supposed to go. Play with it first to see how flexible it is, before actually fitting it in.
6. The CPU installation was done first so that the other parts can be installed around it.
Plug all necessary cables from the Case to the Motherboard. This could be fan or drive cabling.
7. Next install the RAM. The modern motherboard has a simple mechanism for installing RAM. Ensure the RAM is the right side, push the RAM slowly into its slot until the latch is activated by the click sound.
8. The other main components were installed, unfortunately with no photos.
So a quick summary of the subsequent steps are:
- install Hard Drive with SATA connectors.
- install DVD-RW optical drives.
- install network adapter


